Making these gluten-free lemon crinkle cookies is incredibly simple. You don’t need any special equipment (no stand or hand mixers), just a bowl, a whisk and a spatula, and you’re good to go.
To make the cookies, all you need to do is mix the melted butter, sugar, lemon zest, vanilla, eggs and lemon juice until well combined, and then mix in the dry ingredients until you get a smooth, batter-like cookie dough.
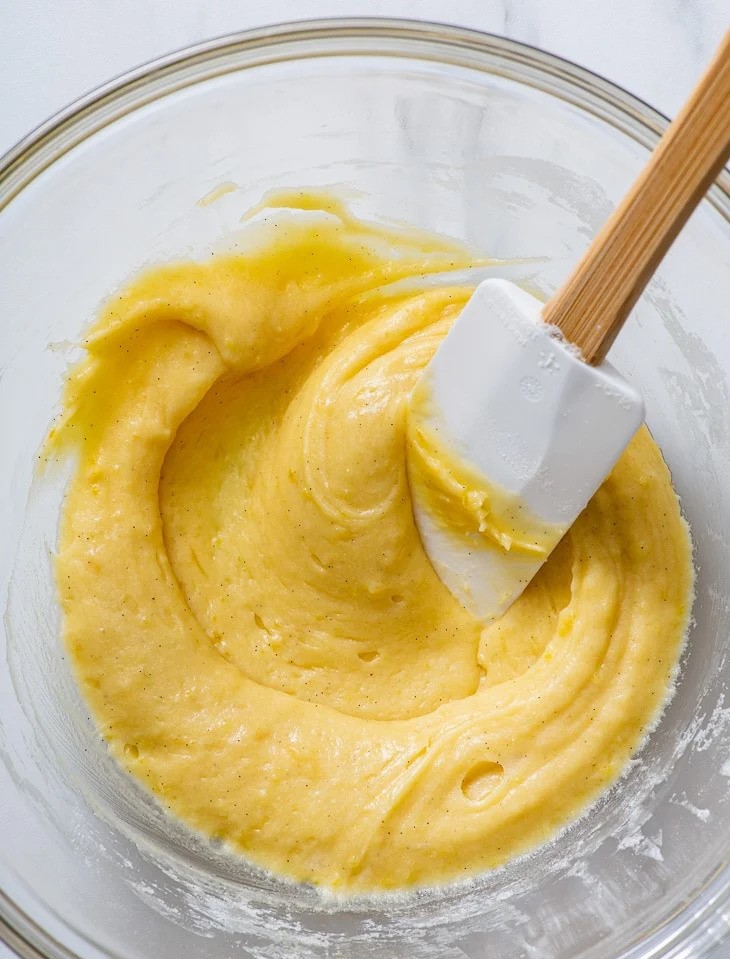
An important thing to remember is that the cookie dough will be more like a batter – very soft and sticky, bordering on runny. Don’t panic when you see how soft it is – and don’t add more flour! The next step is to chill the cookie dough for at least 2 hours before rolling it into balls.
INGREDIENTS
- ▢150 g (¾ cup) caster/superfine or granulated sugar
- ▢zest of 2 lemons (Ideally, use organic unwaxed lemons.)
- ▢70 g (½ stick + 1 tbsp) unsalted butter, melted and cooled until warm.
- ▢½ tsp vanilla bean paste (or 1 tsp vanilla extract)
- ▢2 US large/UK medium eggs, room temperature
- ▢2 tbsp lemon juice (freshly squeezed)
- ▢240 g (2 cups) almond flour.
- ▢1 tsp baking powder
- ▢¼ tsp salt
- ▢100 g (½ cup) granulated sugar, for rolling the cookies before baking
- ▢90 g (¾ cup) powdered/icing sugar, for rolling the cookies before baking
INSTRUCTIONS
Making the cookie dough:
- Add the sugar and lemon zest to a large bowl, and use your fingertips to rub the zest into the sugar. This helps to release more essential oils from the zest.
- Add the melted butter and vanilla, and whisk until combined.
- Add the eggs and whisk well.
- Add the lemon juice and whisk until smooth.
- In a separate bowl, whisk together the almond flour blend, xanthan gum, baking powder and salt, and add them to the wet ingredients.
- Mix with a wooden spoon or a rubber spatula until you get a smooth, batter-like cookie dough. Tip: At this stage, the cookie dough will be more like a batter – very soft and sticky, bordering on runny. That’s how it should be. Don’t add more flour!
- Chill the cookie dough in the fridge for at least 2 hours before proceeding to the next step. You can also keep it in the fridge overnight if you want to bake the cookies the next day. Tip: In addition to firming up the cookie dough into something you can handle and shape into balls, chilling also ensures that the cookies won’t melt into puddles during baking.
Shaping & coating the cookies:
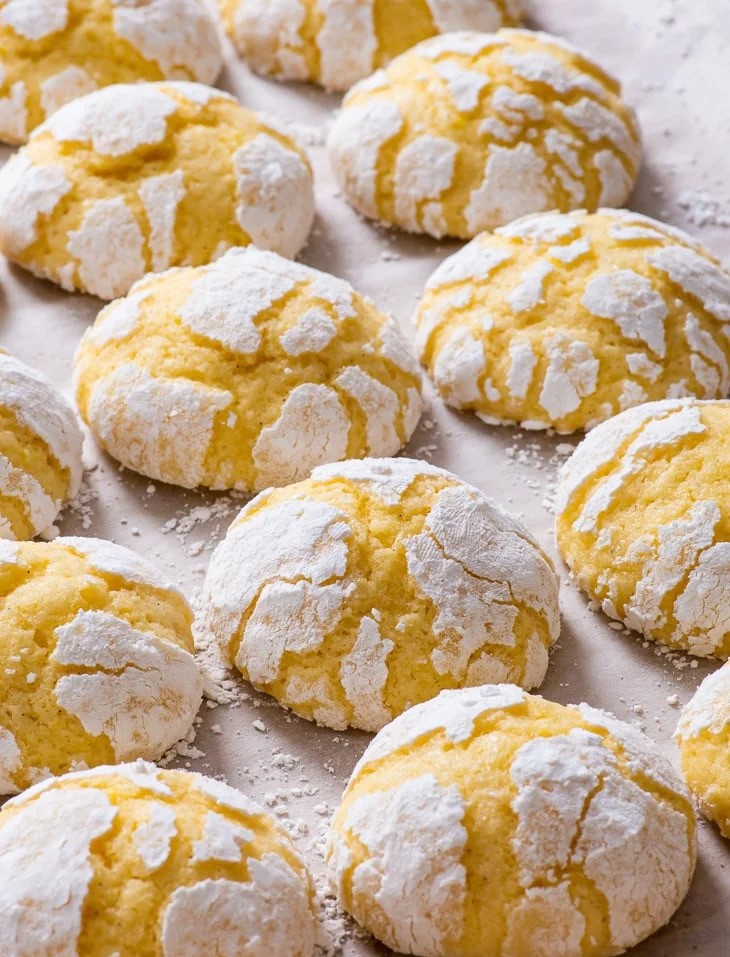
- Adjust the oven rack to the middle position, preheat the oven to 180ºC and line 2 large baking sheets with parchment/baking paper. Tip: You will bake the cookies in several batches, so you can line 2 baking sheets if you have them on hand. Otherwise, just re-use the same baking sheet, but make sure to cool it completely before you place the next batch of unbaked cookies onto it.
- Shape about 1 tablespoon (about 17g) portions of the chilled cookie dough into balls. You should get 30-32 cookies in total. Tip 1: The cookie dough will be still slightly soft and sticky, even after it’s been thoroughly chilled. I like to scoop portions of the cookie dough with a 1 tablespoon measuring spoon that I’ve dipped in a bit of powdered/icing sugar beforehand. This prevents the cookie dough from sticking to the spoon and makes the whole process easier and faster. Tip 2: If the cookie dough sticks to your hands as you go to roll it into a ball, you can lightly dust your hands with a bit of powdered/icing sugar as well. This will prevent sticking.
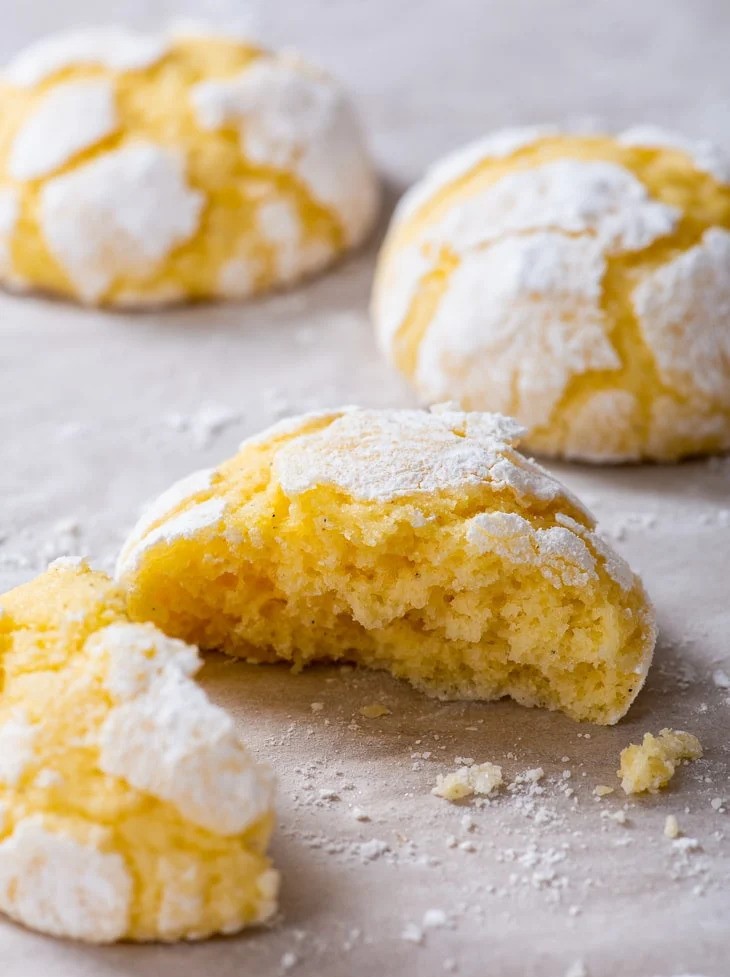
- Roll each ball first in granulated sugar and then in powdered/icing sugar until it’s fully coated. Tip: Rolling the cookies in granulated sugar first results in the prettiest cookies, with a lovely white coating of powdered sugar that cracks to give a beautiful random pattern.
Happy baking!